
How to Edit Photos on iPhone
Nowadays, with social media and digital storytelling prevalent, having striking and well-processed photographs is crucial. Fortunately, smartphone technology has advanced, making it quicker and more convenient to edit images while on the go. If you own an iPhone, you can edit and enhance your images directly from your device with this handy tool. In this lesson, we’ll show you how to edit photos on an iPhone using a variety of tools and techniques, allowing you to take better photos.
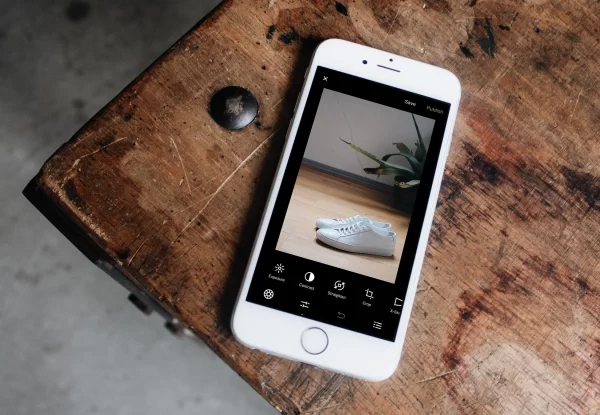
1. Leveraging Built-in Editing Tools
One of the standout features of iPhones is their robust built-in photo editing tools. To access these tools, simply open the Photos app and select the photo you want to edit. Then, tap the “Edit” button in the top right corner to enter editing mode. Here are some key editing tools and techniques you can utilize:
a. Adjustments: Use sliders to tweak brightness, contrast, saturation, and other aspects of your photo’s exposure and color balance.
b. Filters: Apply preset filters to instantly change the look and feel of your photo. Experiment with different filters to find the perfect style for your image.
c. Crop and Rotate: Crop your photo to remove unwanted elements or improve composition. You can also rotate and straighten your photo to correct alignment.
d. Auto Enhance: Let the iPhone’s intelligent algorithms automatically enhance your photo for optimal exposure and color balance.
2. Third-party Editing Apps
While the built-in editing tools on iPhone are powerful, you can further expand your editing capabilities by exploring third-party apps available on the App Store. These apps offer a wide range of advanced features and creative effects to help you achieve professional-looking results. Some popular photo editing apps for iPhone include:
a. Adobe Lightroom: Offers advanced editing tools, presets, and selective adjustments for precise control over your photo edits.
b. Snapseed: Provides a comprehensive suite of editing tools, including selective adjustments, brushes, and advanced filters.
c. VSCO: Known for its stylish filters and film-inspired presets, VSCO allows you to create unique looks for your photos.
3. Experiment with Creative Effects
Photo editing isn’t just about correcting flaws or enhancing colors—it’s also an opportunity to express your creativity and style. Experiment with various creative effects and techniques to add visual interest to your photos:
a. Selective Editing: Use tools like selective adjustments or masking to apply edits to specific areas of your photo, such as brightening a subject’s face or enhancing the colors in the background.
b. Textures and Overlays: Add texture overlays, light leaks, or lens flares to give your photos a unique and artistic flair.
c. Double Exposure: Combine multiple images or textures to create striking double exposure effects.
d. Color Grading: Experiment with color grading to give your photos a cinematic look or evoke a specific mood.
4. Preserve Originals with Non-Destructive Editing
One of the advantages of editing photos on iPhone is the ability to preserve your original photo while making edits. iOS utilizes non-destructive editing, which means that your original photo is always preserved, and you can revert to it at any time. This allows you to experiment with edits without fear of losing your original photo.
5. Share Your Masterpieces
Once you’re satisfied with your edits, it’s time to share your masterpieces with the world. With iPhone’s seamless integration with social media platforms and messaging apps, sharing your photos is quick and easy. You can directly share your edited photos to Instagram, Facebook, X, or send them to friends and family via iMessage or email.
Conclusion:
Using an iPhone for photo editing is a quick and effective approach to improve your pictures and express your creativity. The iPhone offers a flexible platform to advance your photography talents, regardless of your level of experience. Whether you’re a hobbyist trying to take better photos or a seasoned pro searching for professional-grade editing tools. With the methods and advice in this article, you’ll be ready to edit amazing pictures from your phone. Have fun with your edits!
Here are some frequently asked questions (FAQs) about editing photos on iPhone:
1. Can I edit photos directly on my iPhone?
Yes, absolutely! iPhones come equipped with a built-in Photos app that includes powerful editing tools for adjusting exposure, color, cropping, and more. You can access these editing tools by selecting a photo in the Photos app and tapping the “Edit” button.
2. What kind of edits can I make using the built-in Photos app?
The built-in editing tools on iPhone allow you to perform a wide range of adjustments, including changing exposure, adjusting brightness, contrast, saturation, and vibrancy, cropping and straightening, applying filters, removing red-eye, and much more.
3. Are there any third-party apps for editing photos on iPhone?
Yes, there are numerous third-party apps available on the App Store that offer advanced editing features and creative effects. Some popular options include Adobe Lightroom, Snapseed, VSCO, Afterlight, and Pixelmator.
4. How do I revert to the original version of a photo after editing?
When you edit a photo using the built-in Photos app, your original photo is automatically preserved, and you can revert to it at any time. Simply open the edited photo in the Photos app, tap “Edit,” and then tap “Revert” to undo all edits and restore the original version.
5. Can I edit RAW photos on iPhone?
Yes, if your iPhone supports capturing RAW photos (usually available on newer models and with certain third-party camera apps), you can edit RAW files directly in apps like Adobe Lightroom or Snapseed. These apps offer advanced editing capabilities for RAW files, allowing you to adjust exposure, color, and other settings with greater flexibility.
6. Can I edit Live Photos on iPhone?
Yes, you can edit Live Photos on iPhone using the built-in Photos app. When you open a Live Photo in the Photos app, you’ll see additional editing options such as adjusting the key photo, applying effects like Loop or Bounce, and trimming the video portion of the Live Photo.
7. How do I share edited photos from my iPhone?
Once you’ve finished editing a photo on your iPhone, you can easily share it with others by tapping the share button (usually represented by a square with an arrow pointing upward). From there, you can choose to share the photo via Messages, Mail, AirDrop, or various social media platforms like Instagram, Facebook, or Twitter.
These FAQs should help address some common queries about editing photos on iPhone. If you have any other questions or need further assistance, feel free to ask!
Leave a Reply