How to Remove Your Apple Watch Band
The Apple Watch is not just a smartwatch; it’s a style statement. Whether you’re switching bands for a new look or cleaning your device, knowing how to effortlessly remove your Apple Watch band is essential. In this step-by-step guide, we’ll walk you through the simple process of taking off your Apple Watch band without any hassle.
Why Learn to Remove Your Apple Watch Band?
1. Customization: Change your watch’s appearance to match different outfits or occasions by swapping out the bands.
2. Cleaning and Maintenance: Easily clean both your Apple Watch and its bands to maintain a fresh and hygienic accessory.
3. Comfort: Adjust the band for a snug fit, ensuring optimal comfort throughout the day.

Step-by-Step Guide: How to Take Off Your Apple Watch Band
1st Step: Position Your Apple Watch
- Place your Apple Watch on a soft surface, like a microfiber cloth, to avoid scratches.
2nd Step: Identify the Band Release Buttons
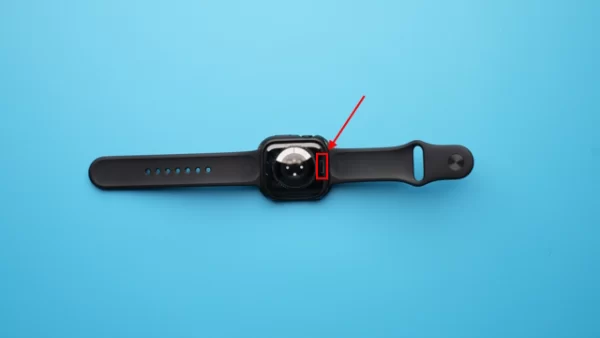
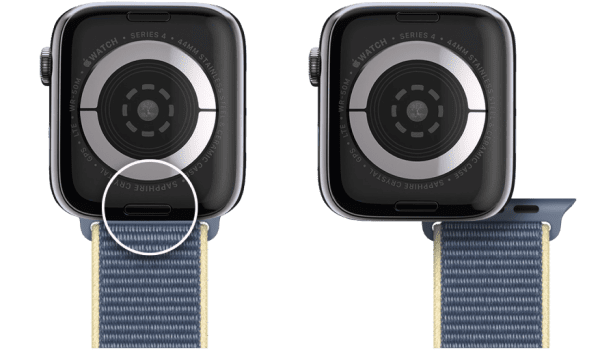
- Turn your attention to the back of the watch. Locate the band release buttons on each side of the watch where the band attaches.
3rd Step: Press and Hold a Band Release Button
- While firmly holding the Apple Watch, press and hold one of the band release buttons. These buttons are usually found on the underside of the watch.
4th Step: Slide the Band Out
- While holding the release button, slide the band out horizontally away from the watch. You should feel a slight resistance, and then the band will smoothly slide out.
5th Step: Repeat for the Other Side
- If your Apple Watch band has a two-piece design, repeat the process on the other side. Press and hold the second band release button and slide the band out.
Step 6: Store or Attach a New Band
- Once both bands are removed, you can store them safely or attach a new band to your Apple Watch. Align the band with the watch’s grooves, slide it in until you hear a click, and release the band release button.
Tips for Taking Off Your Apple Watch Band:
1. Use a Soft Surface: Place your Apple Watch on a soft and clean surface to prevent scratches or damage while removing the band.
2. Hold Firmly: Ensure a secure grip on your Apple Watch while pressing the band release buttons to prevent accidental drops.
3. Check Compatibility: Different Apple Watch models may have slightly different band attachment mechanisms. Confirm compatibility with your specific model.
4. Clean Regularly: Use this opportunity to clean both your watch and the band regularly to maintain hygiene and prevent skin irritation.
5. Explore Band Options: Apple offers a variety of bands for different occasions. Explore the range of bands available to personalize your Apple Watch.
Conclusion:
For every user of an Apple Watch, learning how to remove the band is an easy yet useful skill. Changing bands for aesthetic, comfort, or maintenance purposes can be made simple and hassle-free by following these simple instructions. Easily customize your Apple Watch to fit your style and enjoy its comfort and adaptability.

Leave a Reply