
Unlocking the Power of Communication: How to Send Voice Messages on iPhone
In our fast-paced digital world, communication has evolved to be more than just text and emojis. Voice messages have become a popular and convenient way to express emotions, provide context, and keep conversations alive. If you’re an iPhone user looking to harness the power of voice messages, you’ve come to the right place.
In this guide, we’ll walk you through the simple steps of sending voice messages on your iPhone, ensuring you stay connected in the most personal and expressive way.
Why Choose Voice Messages?
Voice messages offer a unique communication experience that goes beyond text. Whether you want to convey excitement, share a funny story, or clarify a complex idea, voice messages allow you to capture the essence of your message, complete with tone and emotion. Plus, they are a fantastic option for those times when typing is inconvenient or when you simply prefer to speak.
How to Send a Voice Message on iPhone:
Sending a voice message on your iPhone is a breeze. Just follow these steps:
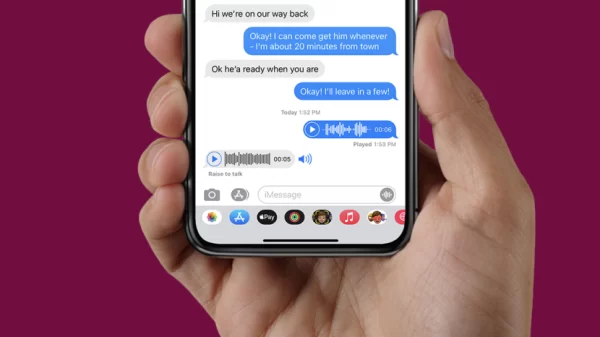
- Open Messages: Begin by opening the Messages app on your iPhone. This is the go-to platform for sending text messages and voice messages.
- Choose Recipient: Select the conversation with the person you want to send a voice message to. This can be an existing conversation or a new one.
- Access the Microphone: To start recording a voice message, tap and hold the microphone icon located to the right of the text input field. You’ll need to keep holding the microphone button while speaking.
- Record Your Message: Begin speaking your message. You can record voice messages for as long as you want. Once you’re done, release the microphone button. Your message will automatically be sent.
- Review or Cancel: Before sending your message, you can review it by tapping the play button. If you’re not satisfied with the recording, swipe left to cancel and start over.
- Send the Voice Message: If you’re happy with your message, simply tap the send button (it looks like an upward-pointing arrow) to share it with your recipient.
Tips and Tricks:
- Hold Steady: Make sure to hold the microphone button steadily to ensure a clear and uninterrupted recording.
- Background Noise: Be aware of background noise as it can affect the clarity of your message. Find a quiet place to record if possible.
- Listening to Received Voice Messages: When someone sends you a voice message, it will appear as an audio file in the chat. Just tap on the message to listen.
- Voice Messages in Group Chats: You can also send voice messages in group chats, providing a more interactive and engaging conversation experience.
Conclusion:
Sending voice messages on your iPhone is a fantastic way to add a personal touch to your conversations and enhance the way you communicate with friends and family. It’s a versatile tool for conveying emotions and providing context that text alone cannot capture. So, the next time you want to share a laugh, express excitement, or clarify a point, don’t hesitate to record and send a voice message. It’s simple, it’s fun, and it’s a game-changer in the world of digital communication. Embrace the power of your iPhone and start voice messaging today!
Frequently Asked Questions (FAQs) about sending voice messages on an iPhone:
Q1: How do I send a voice message on my iPhone?
A1: To send a voice message on your iPhone, open the Messages app, select a conversation, tap and hold the microphone icon, record your message, and then release the button to send it.
Q2: How long can a voice message be on an iPhone?
A2: There is no strict time limit for voice messages on an iPhone. You can record and send voice messages as long as you want, but it’s a good practice to keep them reasonably concise for the convenience of the recipient.
Q3: Can I send voice messages in group chats on iPhone?
A3: Yes, you can send voice messages in group chats on iPhone. Just select the group conversation, follow the same steps for recording, and send the message to the group.
Q4: How do I listen to voice messages received on my iPhone?
A4: When you receive a voice message in a conversation, it will appear as an audio file. Simply tap on the message to listen to it.
Q5: Are voice messages sent on iPhone secure and private?
A5: Voice messages sent through the Messages app are generally secure and private. They are end-to-end encrypted, meaning that only you and the recipient can access the content of the messages.
Q6: Can I send voice messages without an internet connection?
A6: No, you need an internet connection, either through mobile data or Wi-Fi, to send and receive voice messages on your iPhone.
Q7: Can I send voice messages to Android users from my iPhone?
A7: In most cases, you can send voice messages from your iPhone to Android users using messaging apps that support this feature. However, the compatibility may vary depending on the specific apps used.
Q8: How can I share voice messages through other apps or email on my iPhone?
A8: You can share voice messages by tapping the share button (usually represented by an arrow) on the message and choosing the app or method you want to use for sharing, such as email or other messaging apps.
Q9: Can I save voice messages on my iPhone for later reference?
A9: Yes, you can save voice messages on your iPhone by tapping and holding the message and selecting “Keep.” This will prevent the message from being automatically deleted.
Q10: Are there third-party apps for recording and sending voice messages on iPhone?
A10: Yes, there are third-party apps available on the App Store that offer additional features for voice messaging, such as advanced editing and sharing options.
These FAQs should provide answers to common questions about sending voice messages on an iPhone, helping users better understand this feature.
Leave a Reply