
How to Change Your Apple Watch Band
The Apple Watch is not just a smart device; it’s also a stylish accessory that you can personalize to match your fashion preferences. One of the easiest and most effective ways to give your Apple Watch a new look is by changing its band. In this step-by-step guide, we’ll walk you through the simple process of how to change your Apple Watch band, allowing you to seamlessly switch styles to suit any occasion.
A Step-by-Step Guide on Changing Your Apple Watch Band
Step 1: Gather Your Materials
Before you begin, ensure you have the following:
- Your Apple Watch
- The new Apple Watch band
- A flat, clean surface
Step 2: Locate the Band Release Buttons
Turn your Apple Watch over to expose the back. On each side of the watch, near the band attachment point, you’ll find small release buttons. Press these buttons to release the current band.
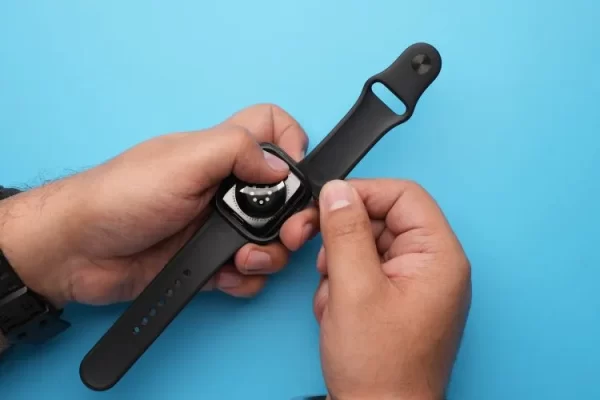
Step 3: Remove the Current Band
While pressing the release buttons, slide the existing band out of the watch. It should come off easily. If you have a sport band, you might need to pull the band slightly to release it.
Step 4: Attach the New Band
Take your new Apple Watch band and align it with the slot on the watch. Slide it in until you hear a satisfying click, indicating that it’s securely attached. Ensure that the band is snug and not loose.
Step 5: Repeat for the Other Side
If your band has a two-piece design (common in many Apple Watch bands), repeat the process for the other side. Align the band with the slot, press the release button, and slide the band into place.
Step 6: Adjust for Comfort
Once both sides are securely attached, wear your Apple Watch and check for comfort. You can adjust the fit by choosing a different hole on the band’s buckle or using the adjustable closure, depending on the type of band you have.
Step 7: Personalize and Enjoy
Congratulations! You’ve successfully changed your Apple Watch band. Take this opportunity to explore various band options – from sport bands for workouts to leather bands for a sophisticated look. Mix and match to complement your outfit or mood and enjoy the versatility of your Apple Watch.
Conclusion
Changing your Apple Watch band is a quick and simple process that can breathe new life into your wearable tech. With a variety of bands available, you can effortlessly customize your Apple Watch to suit any style or occasion. Embrace the versatility of your device and make a fashion statement with a band that reflects your personality.
Leave a Reply